Organizing Yourself as an Indie Developer
Managing All the Things
As an indie developer, you don’t have anyone else to rely on to do certain tasks. You’re responsible for everything pre- and post-launch:
- Idea creation — You have that little lightbulb moment and you need to get that down quickly and flesh out a few points you’re trying to achieve with it.
- Functional aspects — As your idea grows, you start thinking about how people will use the app and what they will expect to be able to do.
- Technical requirements — All the behind-the-scenes stuff you’ll need to implement and either re-use or research if it’s the first time you’ve ever done a particular thing.
- Design — There will be a lot of iteration here. The name, the icon, the color theme — they’ll all change as you keep working on your app.
- Testing — Gaining friends and willing volunteers to see if your creation works the way people expect it to and ironing out those last few bugs.
- Marketing — Your App Store listing, website, social media presence, creating press packs.
- Support — Dealing with users and keeping it efficient to avoid spending all your time responding to enthusiastic users.
- Future roadmap — All those things you had a fuzzy idea about wanting later or feature requests from enthusiastic users once you’ve launched.
- The next big idea — It’s rare that an indie creates just one app and sits there waiting for the money to roll in. As creatives, we’re always looking for new problems to solve, so you go back to step 1 and start creating an idea, all whilst continuing to improve and support your previous apps.
At my day job, I work in a big corporation where all those tasks are handled by separate teams, with another team streamlining the process and creating all the handoff points and status reporting to yet another team. There are a lot of task management tools created to handle all these tasks, but they are too complicated, focusing on that assignment, handoff, and reporting.
As an indie, this won’t be of any relevance and the way the tools are designed will just slow you down. The last thing you want is to spend time managing the task list rather than working on the tasks themselves.
I have tried many different ways of organizing as an indie over the years (Kanban boards such as Trello, GitHub issues, a OneNote document), but they’ve all lacked in flexibility to handle all the tasks we need to do as an indie with just enough organization capability to keep you on track and remember all the activities required. They are great at what they specialize in, and if your app grows, you can move to some of these. I particularly like GitHub issues for open source projects to plan new features and get feedback from users, but at the start of an app, I need something far more freeform. Putting ideas and user stories in GitHub issues just doesn’t work when your thoughts are flowing and changing rapidly at that early stage.
As an indie, you also don’t need to capture the same detail level as you would when handing off to other team members. A short sentence will usually remind you of what’s required for a particular task.
Mind Mapping — It’s Not Just for Initial Doodles
My solution to keeping track of all these tasks in a lightweight manner is to use a mind-mapping tool. At first, my opinion was tainted by the way that I observed people use these tools in a big corp environment: as a glorified doodle they could hand off to others involved in the process.
But a new app idea made me give mind mapping tools a shot. The idea was only half-formed, but I was enthusiastic and wanted to try a way of building that initial seed into something usable and hopefully what people would want. The more I was putting into this tool and liking the way it helped form ideas, the more I explored its capabilities and found I could do far more than just shape that initial idea. I could create checklists, store links to research, group things into different high-level tasks, and organise random items into features and releases. And with the primary view being just a title, it gave me that mental jog on what’s required.
There are a lot of mind-mapping tools available, all with different features and price tags. Since this was my first time using a mind-mapping tool, I set some very basic selection criteria:
- It must be available and sync between all the platforms I care about so I could capture ideas whilst sitting on the sofa, on the train, and at my desk.
- Have the minimum amount of structure. I wanted to spend as little time with this tool performing housekeeping as possible. Even if it had optional dates or priorities, I avoided them. Just seeing those fields on a form encourages me to be a completionist and come up with arbitrary values I’d never meet or care about.
- Have a design aesthetic I would enjoy working with every day. If a tool didn’t conform to a platform’s design guidelines, it would grate on me every time I used it and quickly lead to me abandoning it.
- Have an export capability so if I find a better tool later, I could take my work with me (most tools allow importing OPML and FreeMind formats, so look out for these).
With these criteria, I settled on MindNode. This article is in no way a pitch for this particular app. It met all my criteria to start exploring using a mind-mapping tool, but there are many available that would function just as well.
If you want to start getting into mind mapping, then create your own basic criteria. Don’t worry about comparing features on things you don’t even know if you will use yet. You’re exploring a new way of organizing — not setting a big corp strategy — and if you find a better tool later, having one that allows you to export will make the transition easy. Concentrate on the features that will make you use it and stick with it.
Shaping an Idea
I started off using a mind-mapping tool as everyone thinks of them. That starting bubble, just one or two words that sum up the app. It usually gets changed to the app name later, but for now, you need that title to identify this mind map. A few I’ve used for apps are Countdown, Timer, Shopping List, and Barcodes. Even though you don’t know what apps they became, you know a little of what they are for already.
From that initial bubble, it’s easy to just start adding every random thought that comes into your head that you want to capture, which mind-mapping tools are designed to handle well. With that said, I do like to add a very minimal starting structure. I add three nodes immediately: Purpose, Technical, and Design. These will later be split into more nodes, but at this point, my mind is flitting between these aspects, so I need to group things very loosely.
Purpose
This is where the idea of the app is formed. They are either statements or multiple nodes in a question-and-answer format. That way, as I progress, I can add more answers. None are right — they are all options at this stage. I also chain nodes to back up a statement, which can often lead to questioning that statement later. Nodes here will often become technical items or user stories that you can either move from purpose or link to, depending on whether the idea is fully formed.
Technical
As you start defining the purpose of your app and sometimes the design, you’ll start running into things you’ve never done technically. Add them here. You’re building your research list for later and getting that worry about how hard something is out of your head.
Design
Like the technical node, this is a holding area to quickly get thoughts out of your head, allowing you to revisit them and probably iterate on your previous thoughts. Design, for me, covers everything on how I want to present the app.
I always start with Name and Icon, which are usually the last things to get finalized, but as the app progresses, new ideas keep occurring.
I’ll also start capturing thoughts on how I want the app to look, which is usually heavily influenced by the latest trends and anything I haven’t done before, so it will be nav bars, tab views, single screen. It inevitably won’t stick as the purpose and technical aspects evolve, but again, the idea is to stop dwelling on this irrelevant thought now and comforting yourself that it won’t be forgotten.
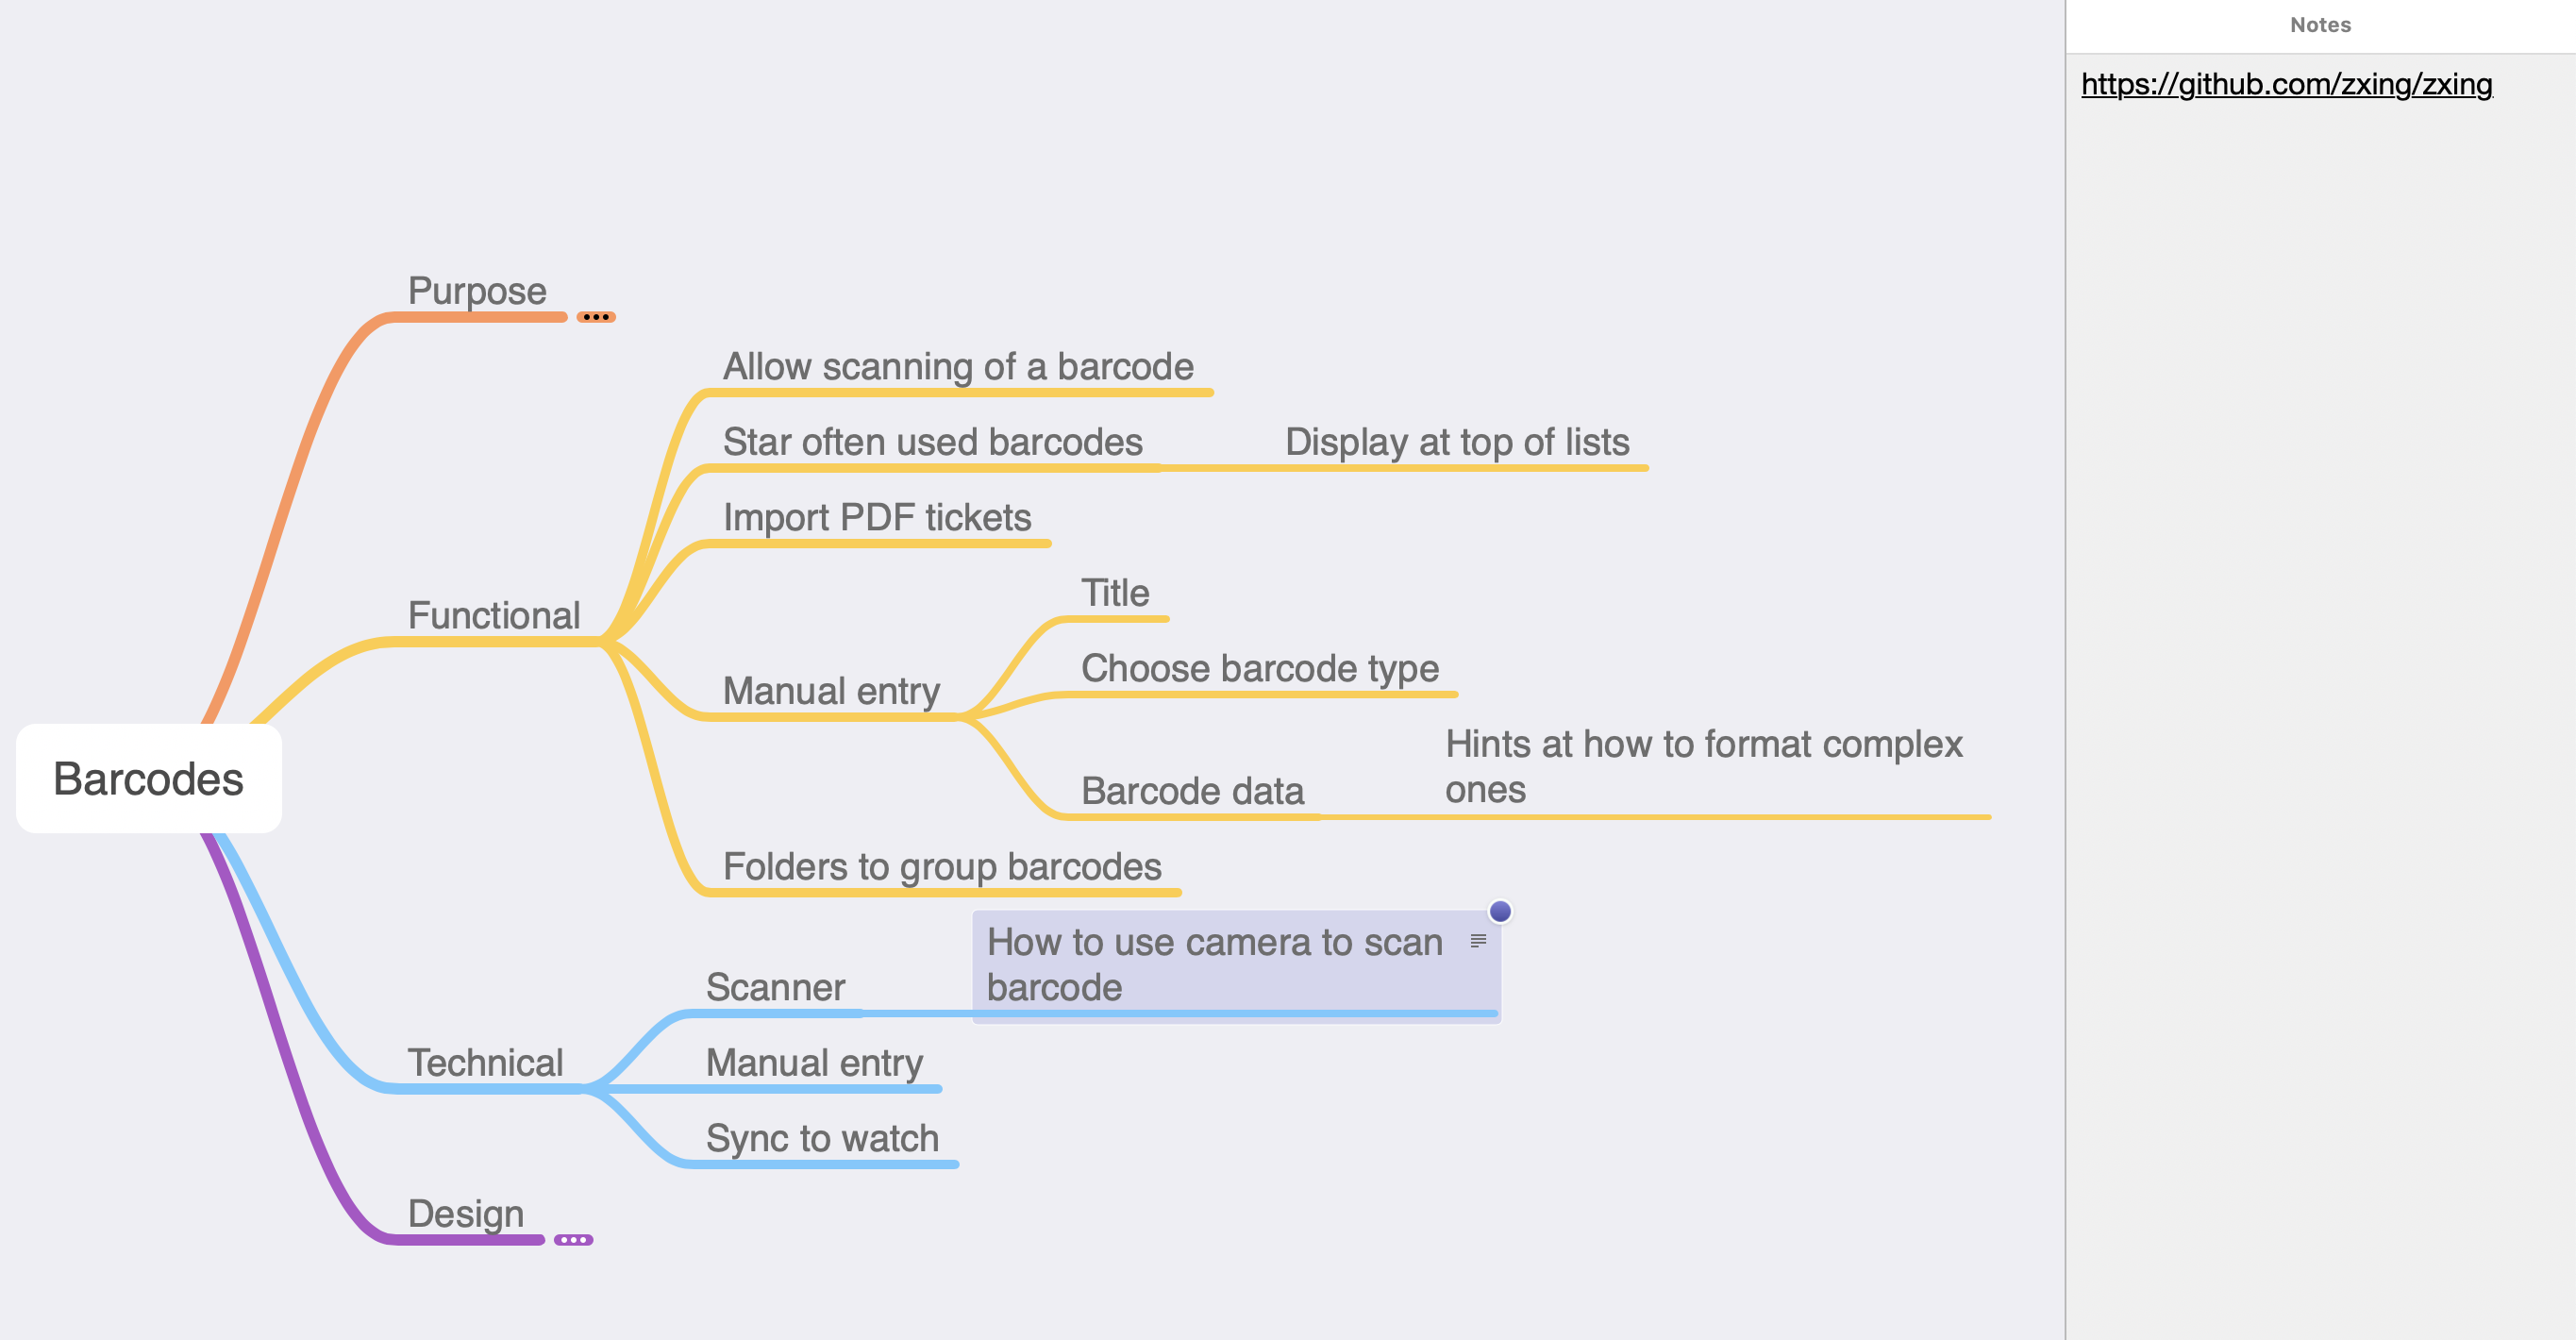
The start of an idea
After a few minutes, you’ll get a mind map you can start fleshing out with more and more detail until you are ready to create actionable items:

Every mind-mapping tool gives options to style things as much as you want, changing node shapes, colors, adding images. If it helps to add visual clues to where your thoughts are going, do so. I tend to stick to the default formatting applied. For some really big topics, I will add an icon to make it easy to identify later.
Functions and Research
Normally, most people think mind mapping stops there. But after discovering the Notes feature, I saw a way to continue using this very graphical tool to gather the next level of detail I needed before starting to write code.
I need two specific things:
- Functional items to build
- Research on how to build those things
I already have a technical node with some scary titles of things I don’t know. I start researching these items, gathering as many articles as I can find, and storing the links in the notes to later draw on these to implement that new technical capability. For the functional items, I create a new Functional node off of the root. Many organizations call these user stories, but for our purposes, these are the things we will need to build that will break down into achievable tasks and draw on what we’ve been researching under the technical branch. We don’t need to be as prescriptive as a user story typically is.
Only be as detailed as you need to be. If there’s some really complicated logic you’ve thought about, then add a note about it. If you are adhering to an industry design guideline, you don’t need to detail how navigation will work. Save time. If you will forget a particular nuance, then detail it. If you only see one option, then don’t. You are not writing long-living technical documentation. You are trying to make an app and organize your work as efficiently as possible.
Tasks
Now that you have your purpose nailed, your functional items listed, and research into the technical areas you need to implement noted, you are probably ready to start coding.
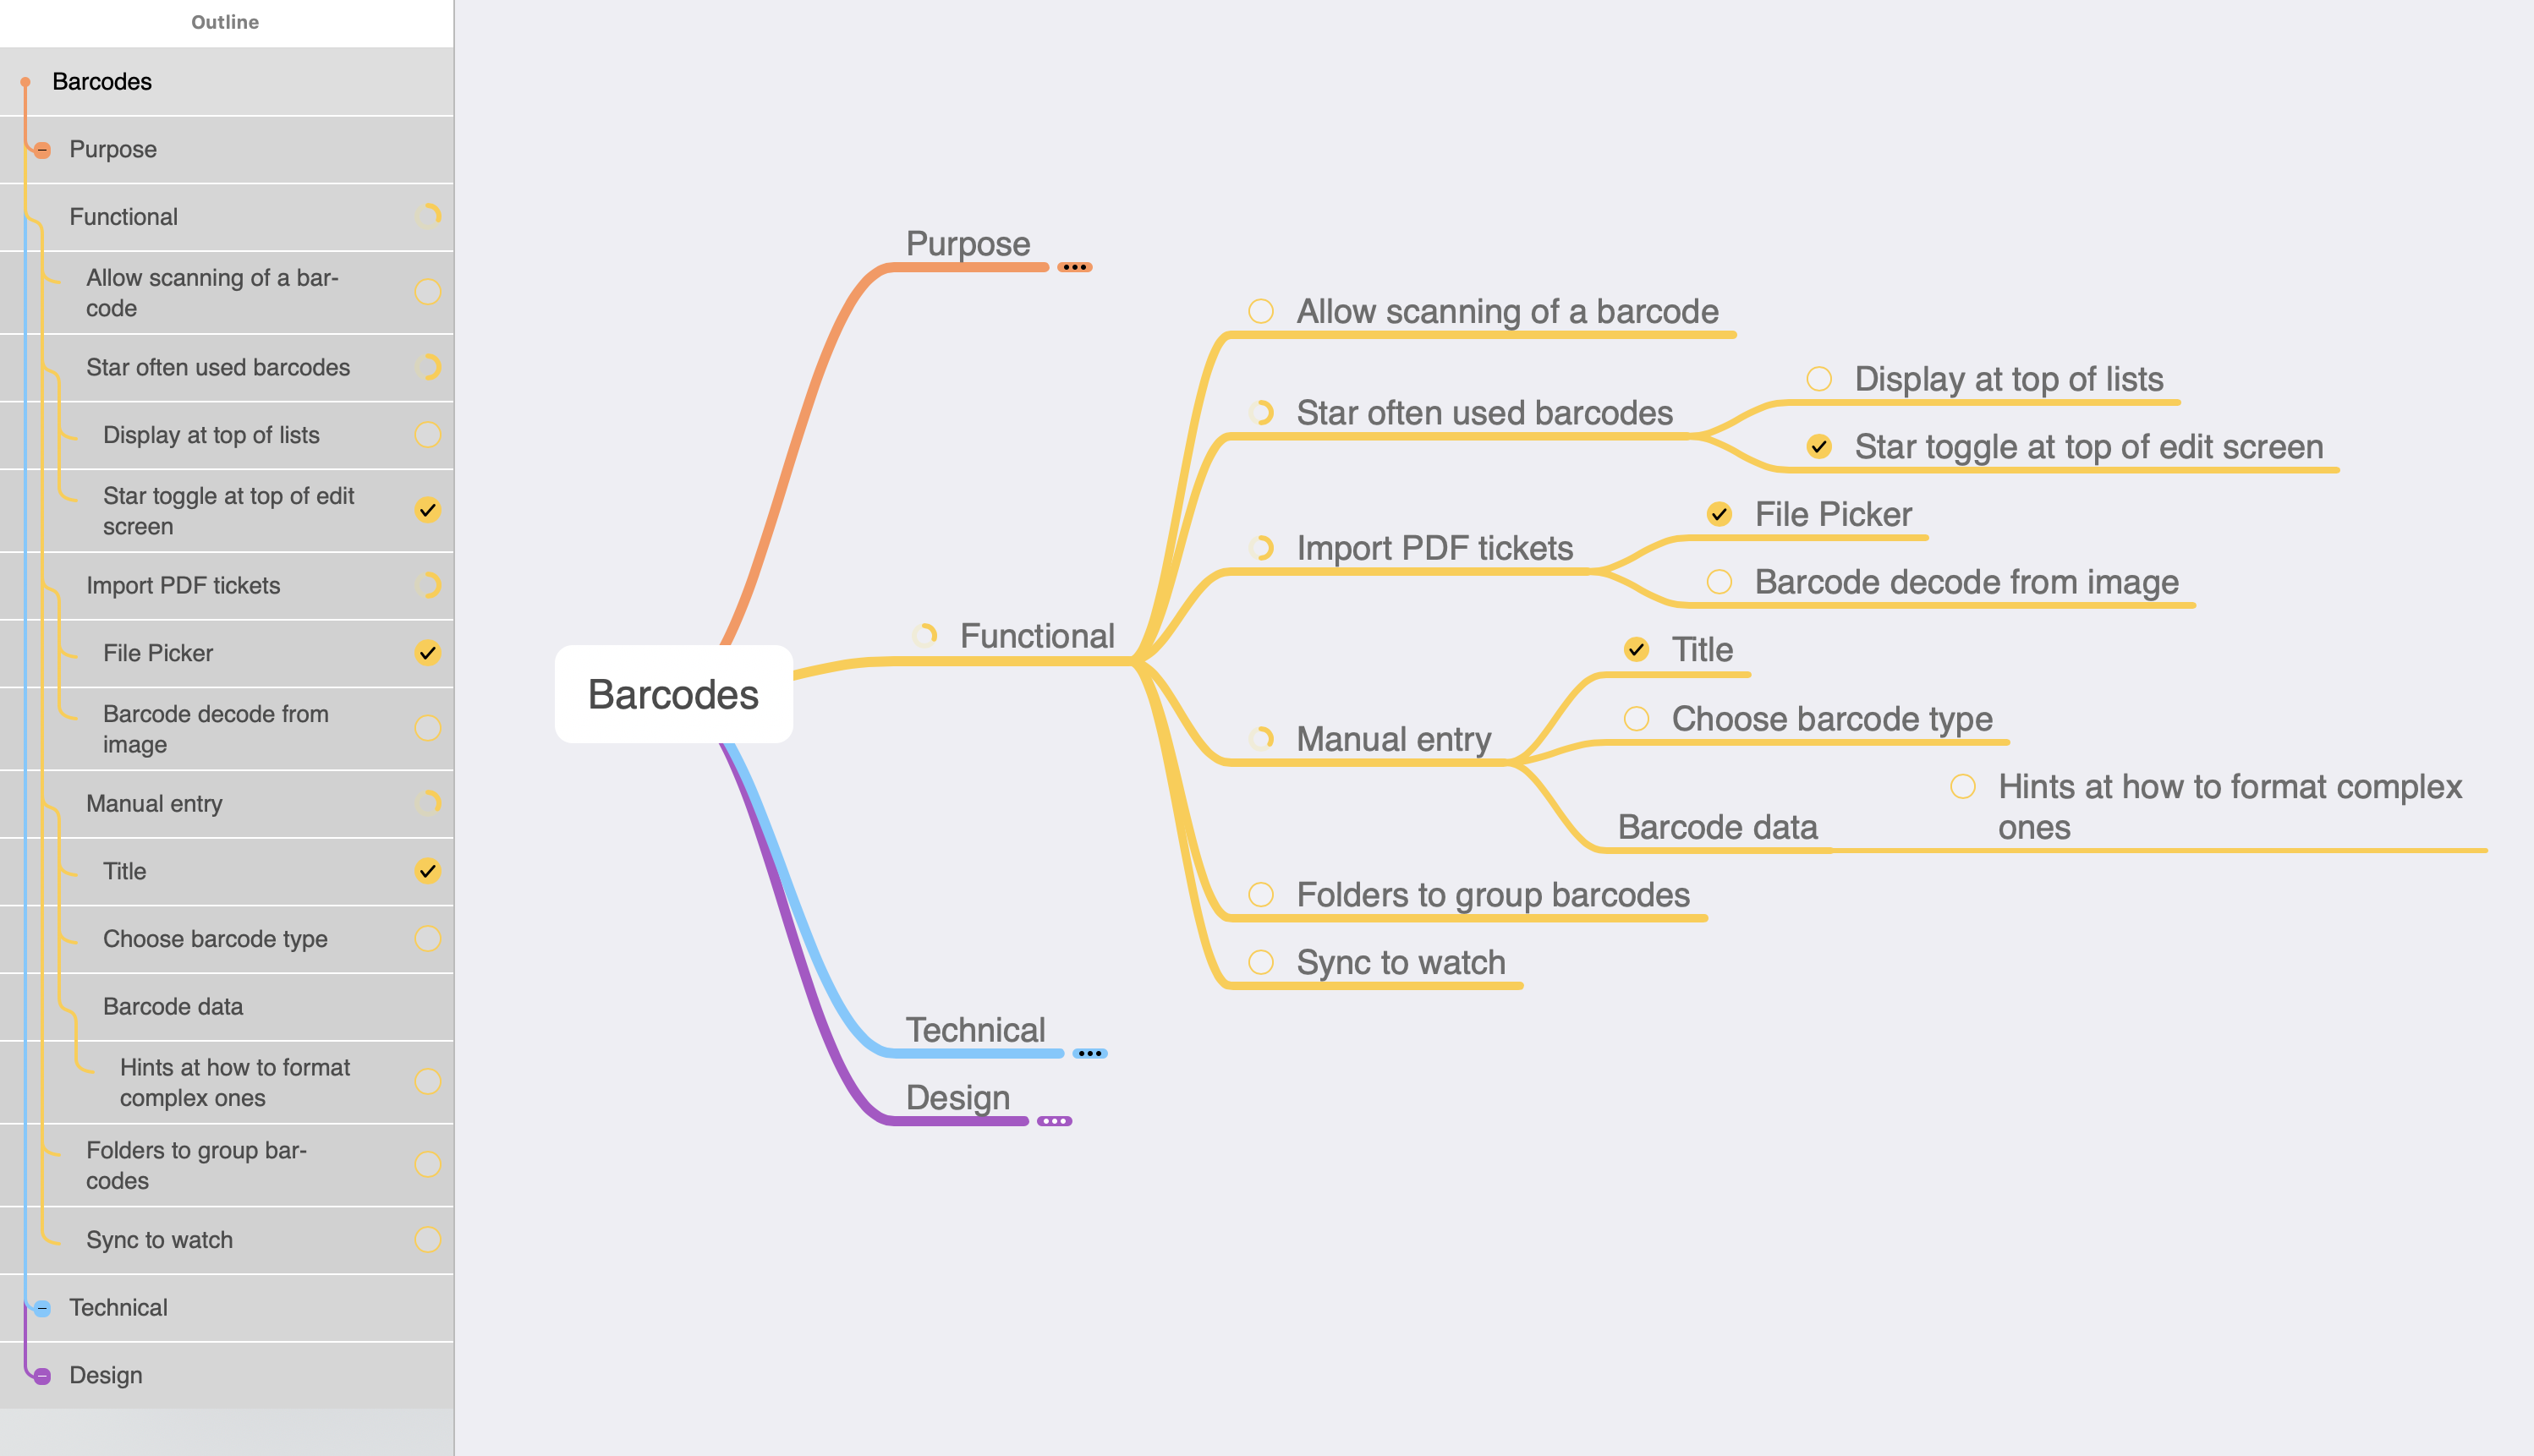
This is where all those nodes under Functional will come into their own. You can add tasks to them, allowing you to easily track the status of how far you are with implementing them. The functional list won’t be complete and you will keep adding child nodes to items as you work through them, but this acts as your task list and spurs you on as you start checking off tasks and completing a function.
Most mind-mapping tools come with a handy outline view where you can filter nodes. You’ll want to display only the ones set as a task and then you immediately have your worklist organized by function. It’s a great incentive to tick those tasks off and, with MindNode, watch the rings close on functional aspects of your app.
Getting Ready for Release
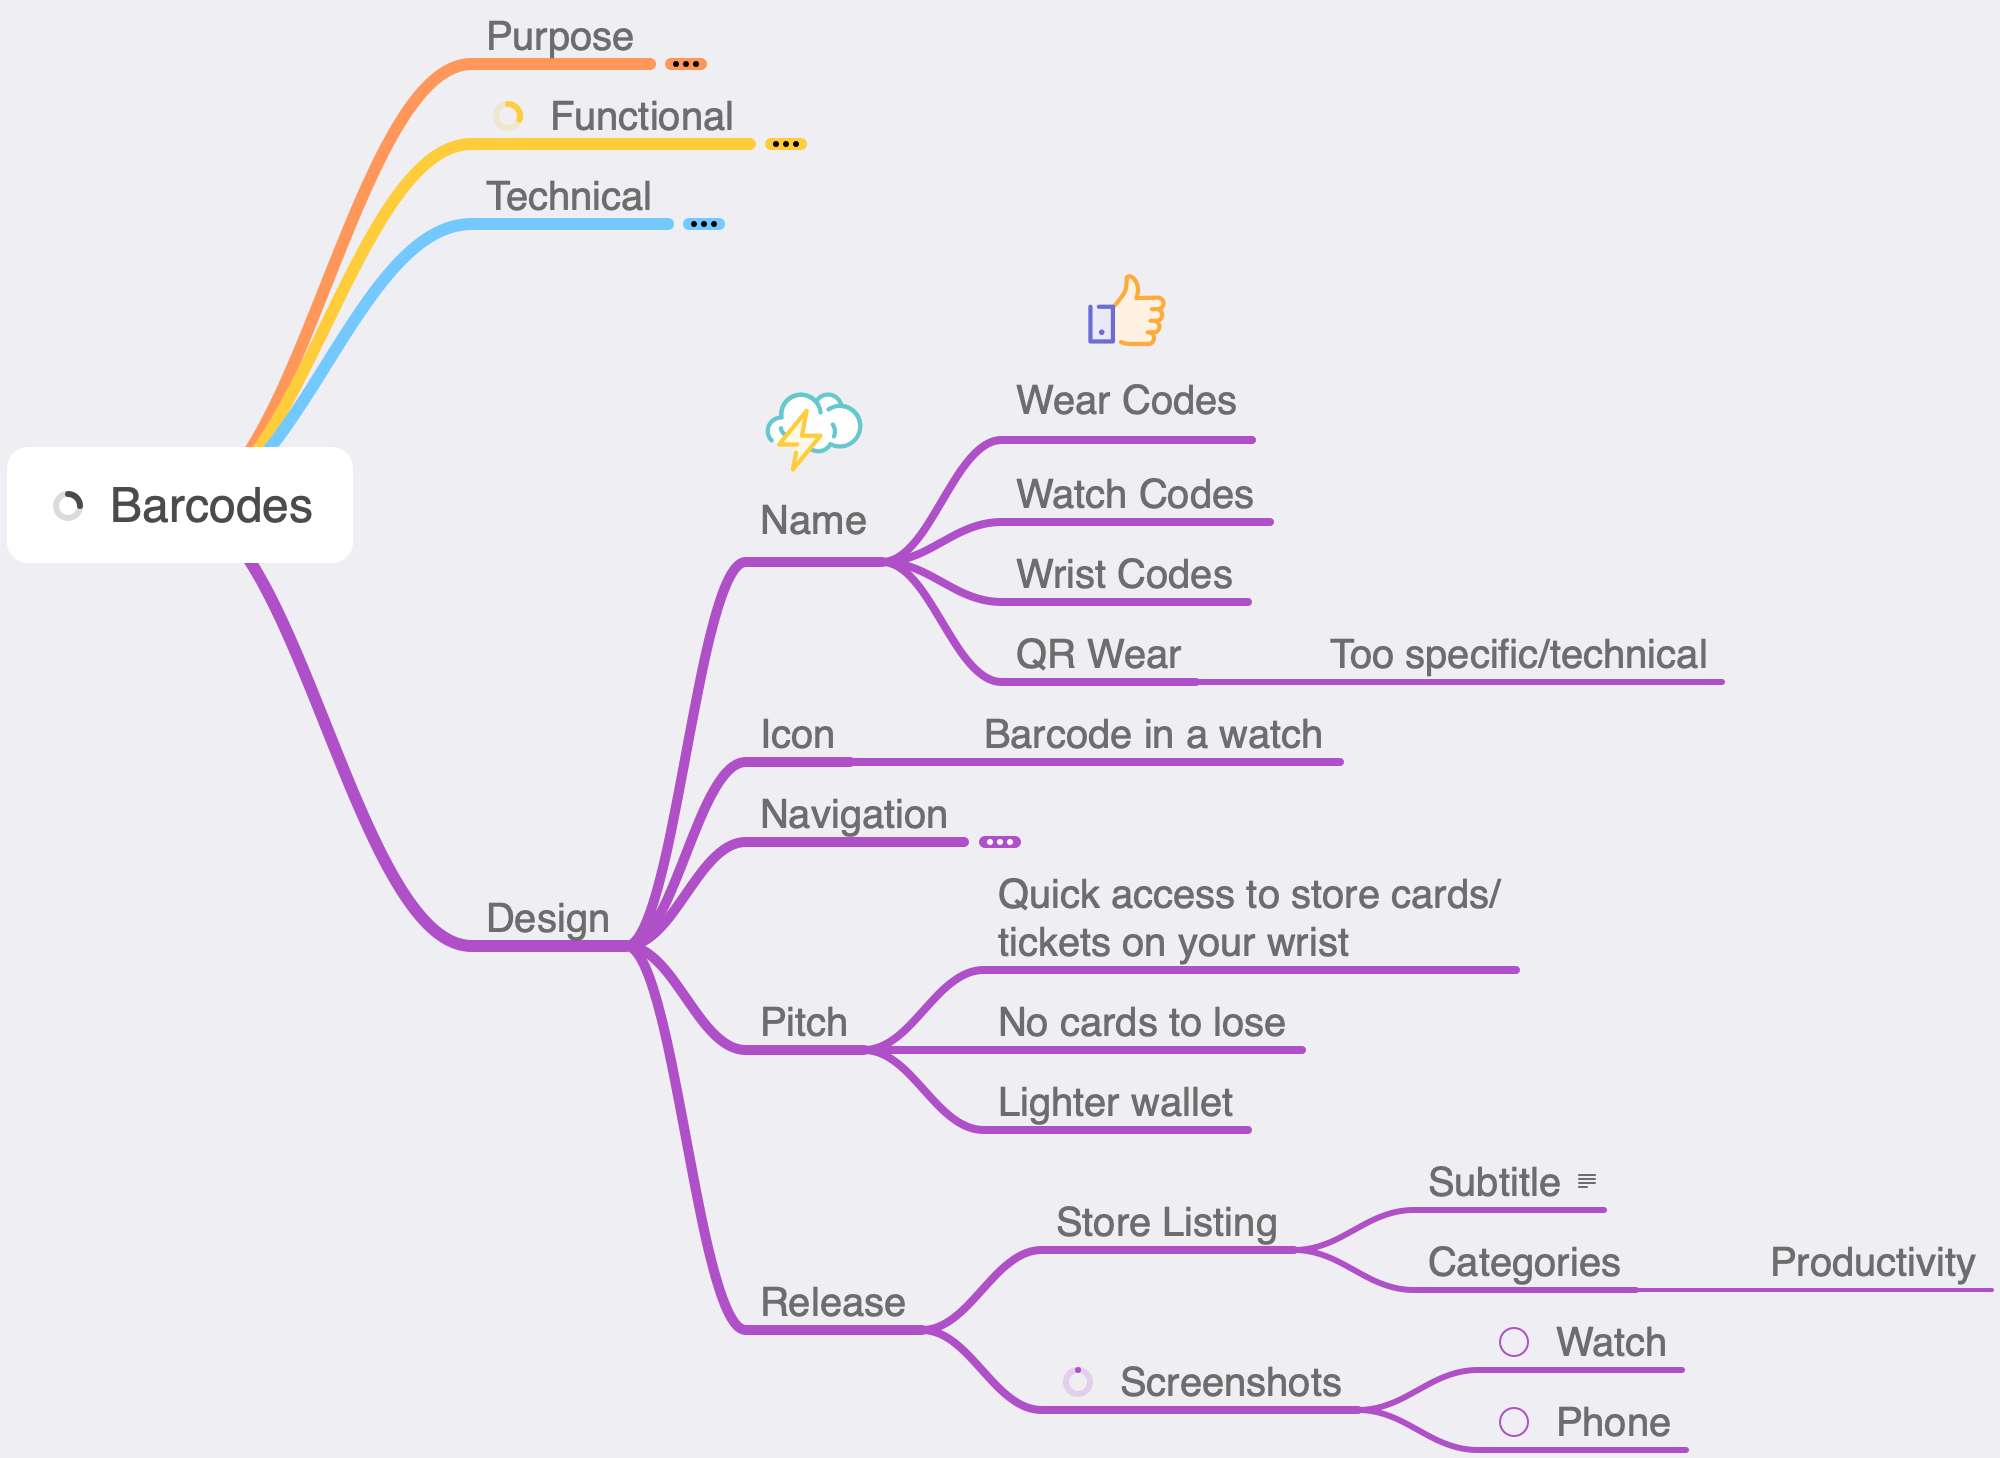
Remember, I wanted a mind-mapping tool that would sync across all my devices. As inspiration hit on the sofa, I was adding thoughts on my unique selling pitch and there are now lots of disconnected thoughts in the design branch to allow me to draw out my best ideas and make my store listing.
Your purpose and functional nodes will allow you to draw out your unique features for your store listing. You can either cross-link the nodes or create new refined ones for the pitch items.
I also use the design branch for making a list of release tasks such as screenshots, store listing, social posts, etc., though a separate release branch could be used if you start having a lot of tasks build up.
Post-Release
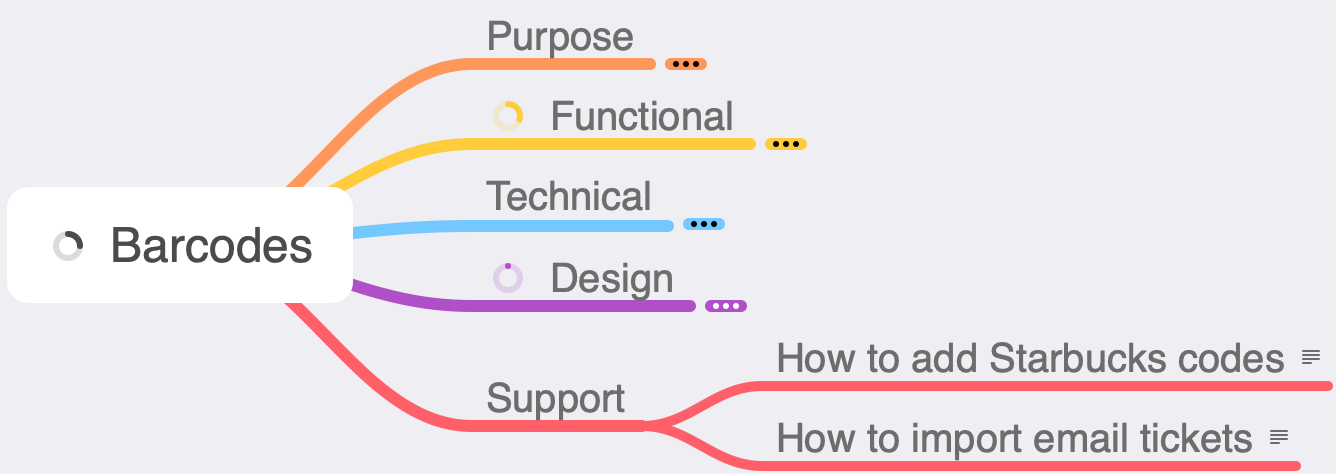
Even though you think you’ve made the most intuitive app in the world, not everyone thinks like you and support questions will inevitably come in. To reduce the burden of answering these, I build up a Support branch with questions and my responses so I can quickly copy/paste answers. When I get enough people asking the same questions, I either revisit my app design to try to make it easier or add that particular question to an FAQ page for my app.
As enthusiastic users suggest new features, you can start adding them to your functional/technical branches, building out your new tasks for the next version.
Wrap-Up
I hope you found my use of mind mapping insightful. You can use just one tool for the whole lifecycle of an app, and it becomes a living history and documentation for your app with just the right amount of detail that you need as an indie.
Depending on the size of your app, the amount of support you have to do, or if your team grows, you may find that some of these uses for mind mapping start to become suboptimal. The important thing is to try things and evolve your usage over time, but as an indie, having one tool to organize your thoughts and tasks is a good first step.